Screenshoting is a very useful tool for many people. I think everybody, at any time, would need to take a picture of something in his screen. I'm an Arch linux user, with a XFCE windows manager. In this enviroment exists a nice tool called xfce4-screenshoter, which worked fine. I liked because it was easy and fast. It had some posibilities to store the image or to save in the clipboard.
But recently, I heard about a new tool developed by a friend in my university, which sounds very good, and I tried it. Its name is Flameshot, and even being in an early stage of development, work incredibly nice. It is quite light and very user-friendly. And even that, it has lots of tools to tweek your capture. You can draw lines, circles, rectangles, arrows, mark text... And additionally you can use the blur tool to hide something from your capture.
The tool has been very welcomed by the linux community and has become quite popular in the last months, therefore its installation has become very easy. It has appeared lots of packets for the most common distros:
pacman -S flameshot
Also exists the AUR package: flameshot-git * Debian 10+
apt install flameshot
apt install flameshot
dnf install flameshot
xbps-install flameshot
Of course, also you can compile it from source if you want to have the most recent changes. You can follow the steps in its github repo
Usage
Once installed, Flameshot can be launched from a terminal using the command flameshot. This would start a background application which allows you to take a screenshot whenever you want. If you have a notification panel like, in my case, XFCE, you'll see a new icon on it:

Left click on the icon will launch a screenshot gui where you can select an area to be captured.
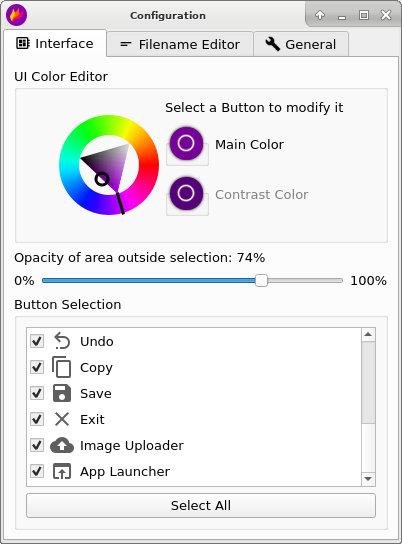
Right click will open a menu with the two options showed in the previous image. The configuration option will open a friendly GUI configuration menu where you can change the interface appereance and the buttons displayed around the capture area.
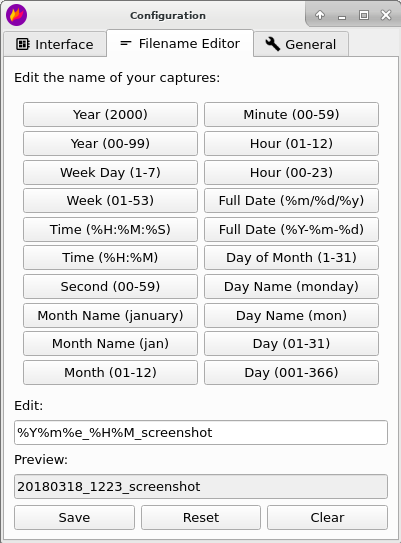
In the second menu you can configure the authomatic name given to the captures. You can use the typical unix time format, but there's also buttons to write it down directly.
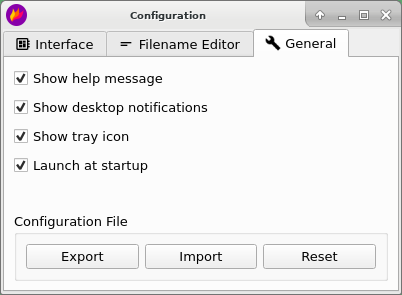
And in the last menu you can configure general behavior of the application, as desktop notifications, tray icon or allow the application to launch on computer boot. You can also export your configurations into a new file, import from other file or set the default configuration.
By default, the configuration file is stored in:
~/.config/Dharkael/flameshot.conf
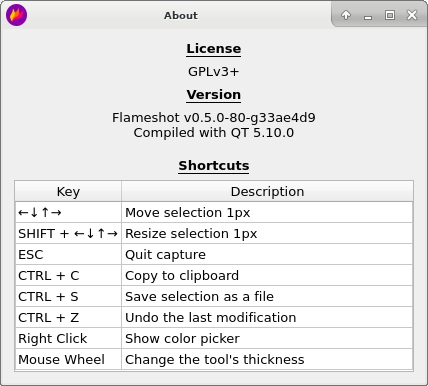
The other buttom in the tray icon will show you a typical "About" window, with information about the version number and some useful shortcuts for the gui interface.
By command line
You can also launch flameshot captures using the comand line terminal which allows you to do some interesting things. Flameshot has implemented a bash completion tool, so, if you're using Bash, you would be able to complete the command through the posible tools and options. Completing the command flameshot with TAB key you could see:

And always you can write --help and you'll get a help message explaining the
posible options and how to use them.

By using the command line you have infinite posibilites for scripting or authomatic screen capture for example. Also you can define a delay in milliseconds to capture the image.

Definig shortcuts
In order to make easier the capture of your screen, I like to define a keyboard shortcut to launch Flameshot.
In may case, with XFCE, I've defined two shortcut in the Keyboard menu from xfce:
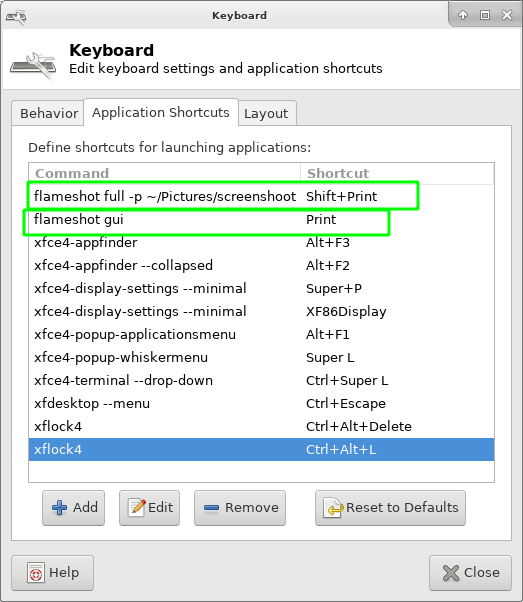
You can use some of this examples too:
- Capture with GUI with custom save path:
flameshot gui -p ~/pictures/screenshot
- Open the GUI with a delay of 5 seconds:
flameshot gui -d 5000
- A fullscreen capture with custom save path and copying to clipboard too:
flameshot full -c -p ~/pictures/screenshot
GUI shortcuts
These shortcuts are available in GUI mode:
| Keys | Description |
|---|---|
| arrows | Move selection 1px |
| Shift + arrows | Resize selection 1px |
| Esc | Quit capture |
| Ctrl + C | Copy to clipboard |
| Ctrl + S | Save selection as a file |
| Ctrl + Z | Undo the last modification |
| Right Click | Show color picker |
| Mouse Wheel | Change the tool's thickness |
- Shift + drag a corner: mirror redimension in the opposite corner.
Conclusions
I just have to say that after I knew Flameshot in the summer of 2017, is THE application I use to capture my screen. It works perfectly and has the perfect combination of simplicity for taking a simple capture or decorate it with more advanded stuff.
Also remember that, due to the magic of free software, it would be continually improving thanks to the developer community around it. So I encourage you to help developing something or simply reporting something that don't work correctly or something you miss. In my case I helped with the development of the bash completion functionallity.
If you want to see the code or help in the development process go to its GitHub page: https://github.com/lupoDharkael/flameshot
Special thanks to @lupoDharkael for creating this amazing tool.
Comments !